Create a Personal Data Center

Prerequisites

We will be using the IONOS Data Center Designer to build virtual machines for personal use.
IONOS is inexpensive to use and will afford you the ability to install your VMs without any customization by the hosting provider.
Create Your Account
Go to dcd.ionos.com and click on “Become a customer now…” at the bottom of the login screen.
Choose Your Region
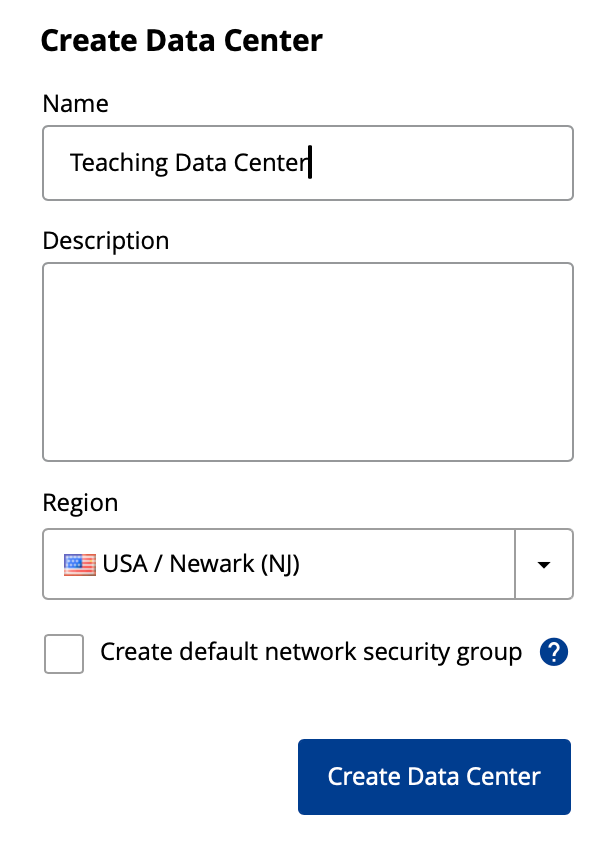
After creating your account you can click on “Create new” under “Virtual Data Centers.”
You can name your data center, select the region closest to you and click “Create Data Center.”
Provision a Virtual Private Server
On the right, click on “Enable IPv6 on all LANs.”
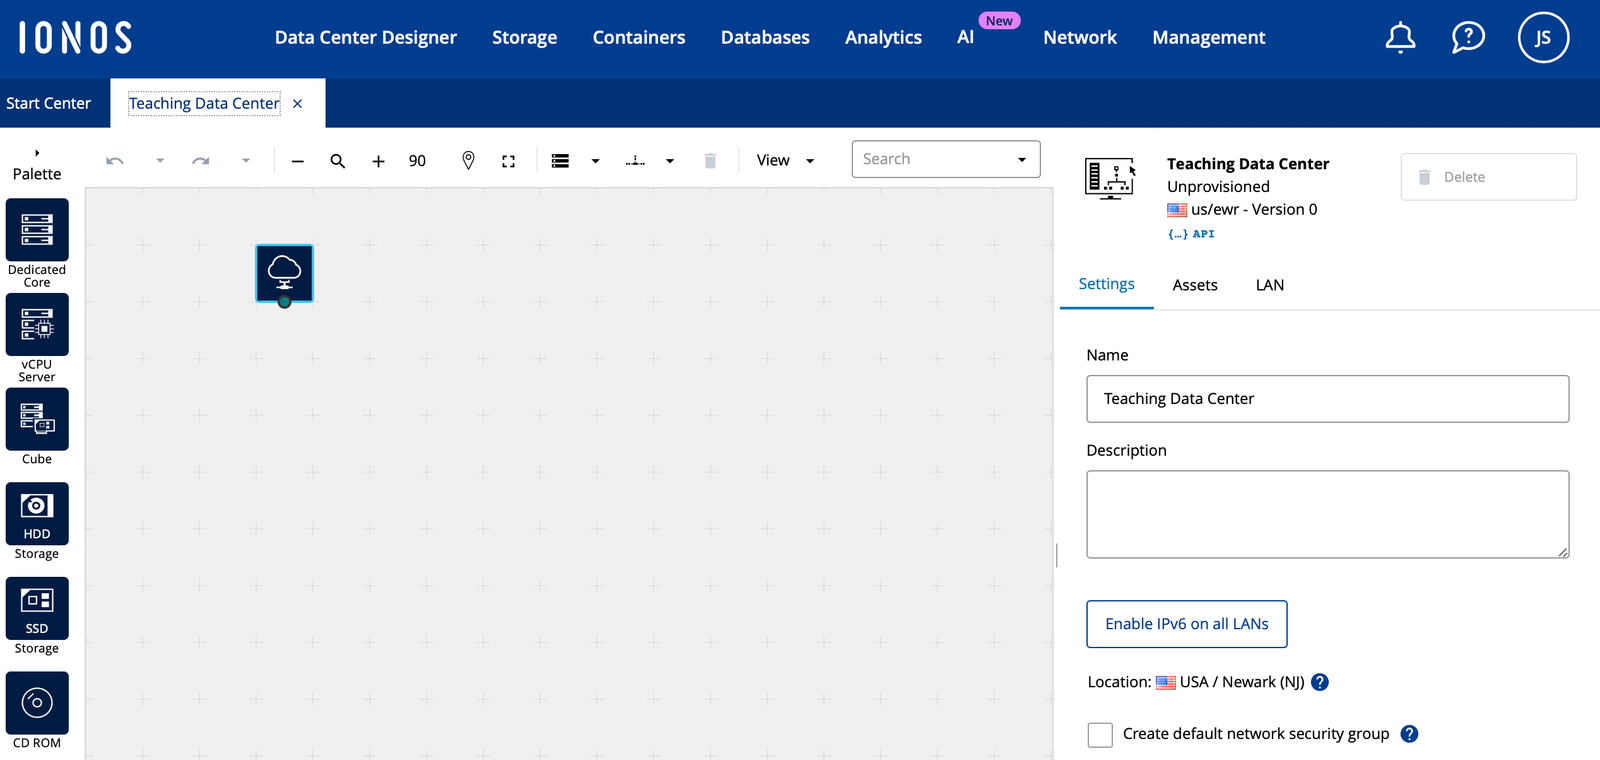
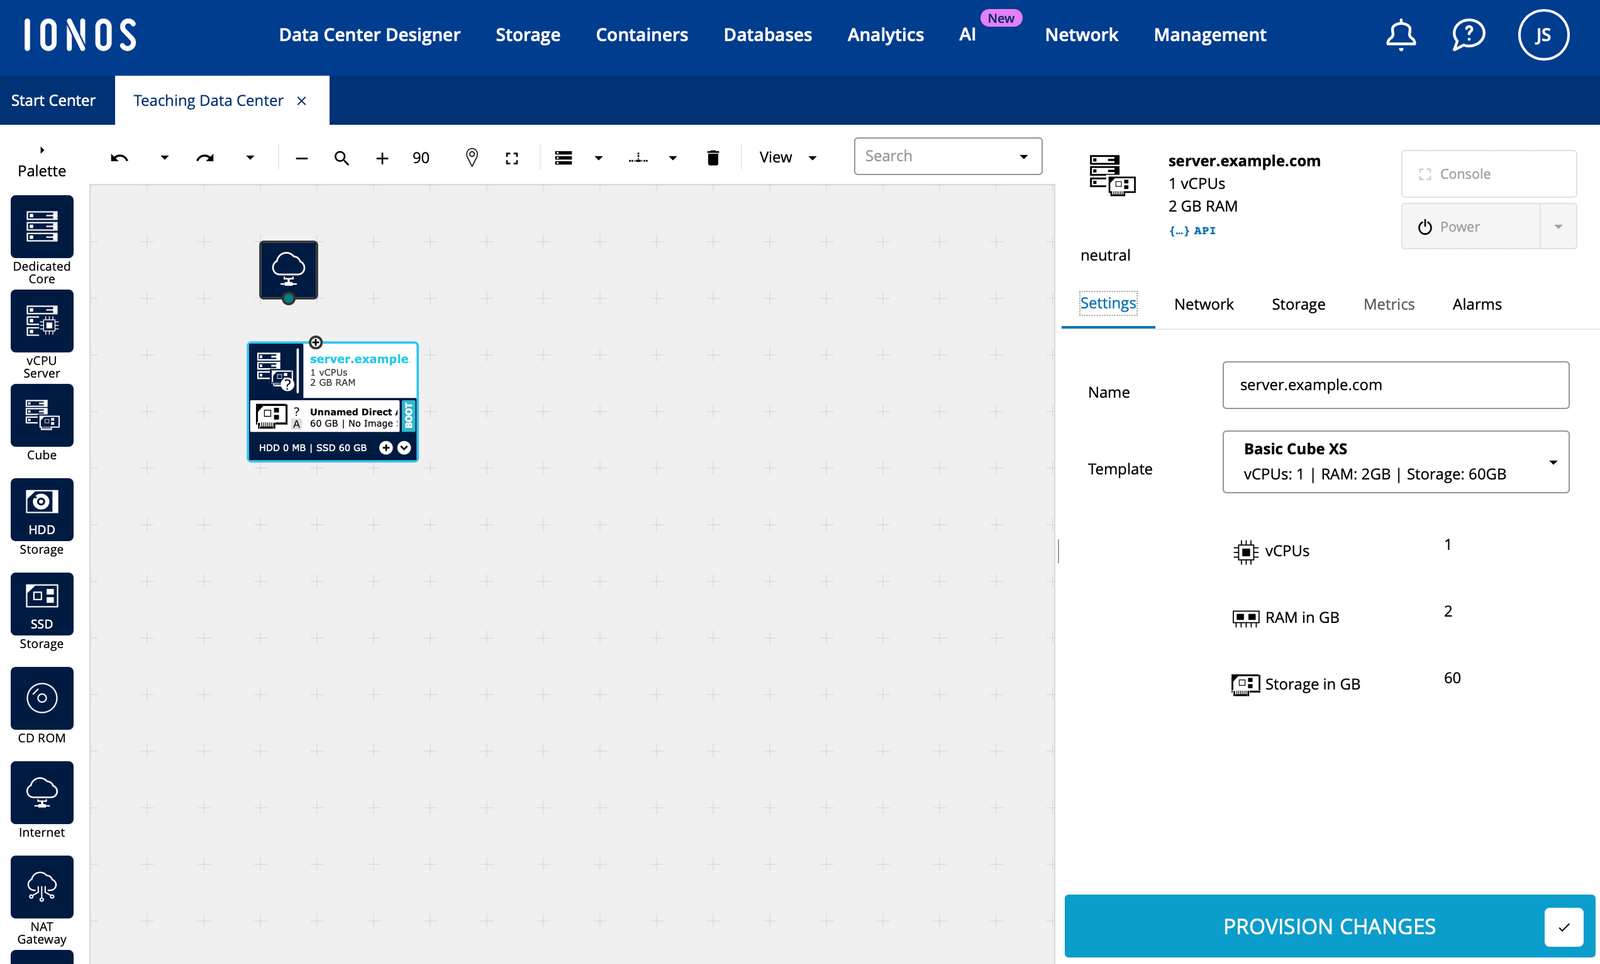
Drag and Drop a “Cube” onto the board.
Name your server.
Leave the “Template” as default unless you need more resources.
Provision the Network
While on the “Cube” click on “Network” then “Add NIC.”
Click on the down arrow next to “LAN2,” choose “LAN1” and “Change NIC to LAN1.”
Set “Firewall” to “Ingress” and click on “Manage Rules.”
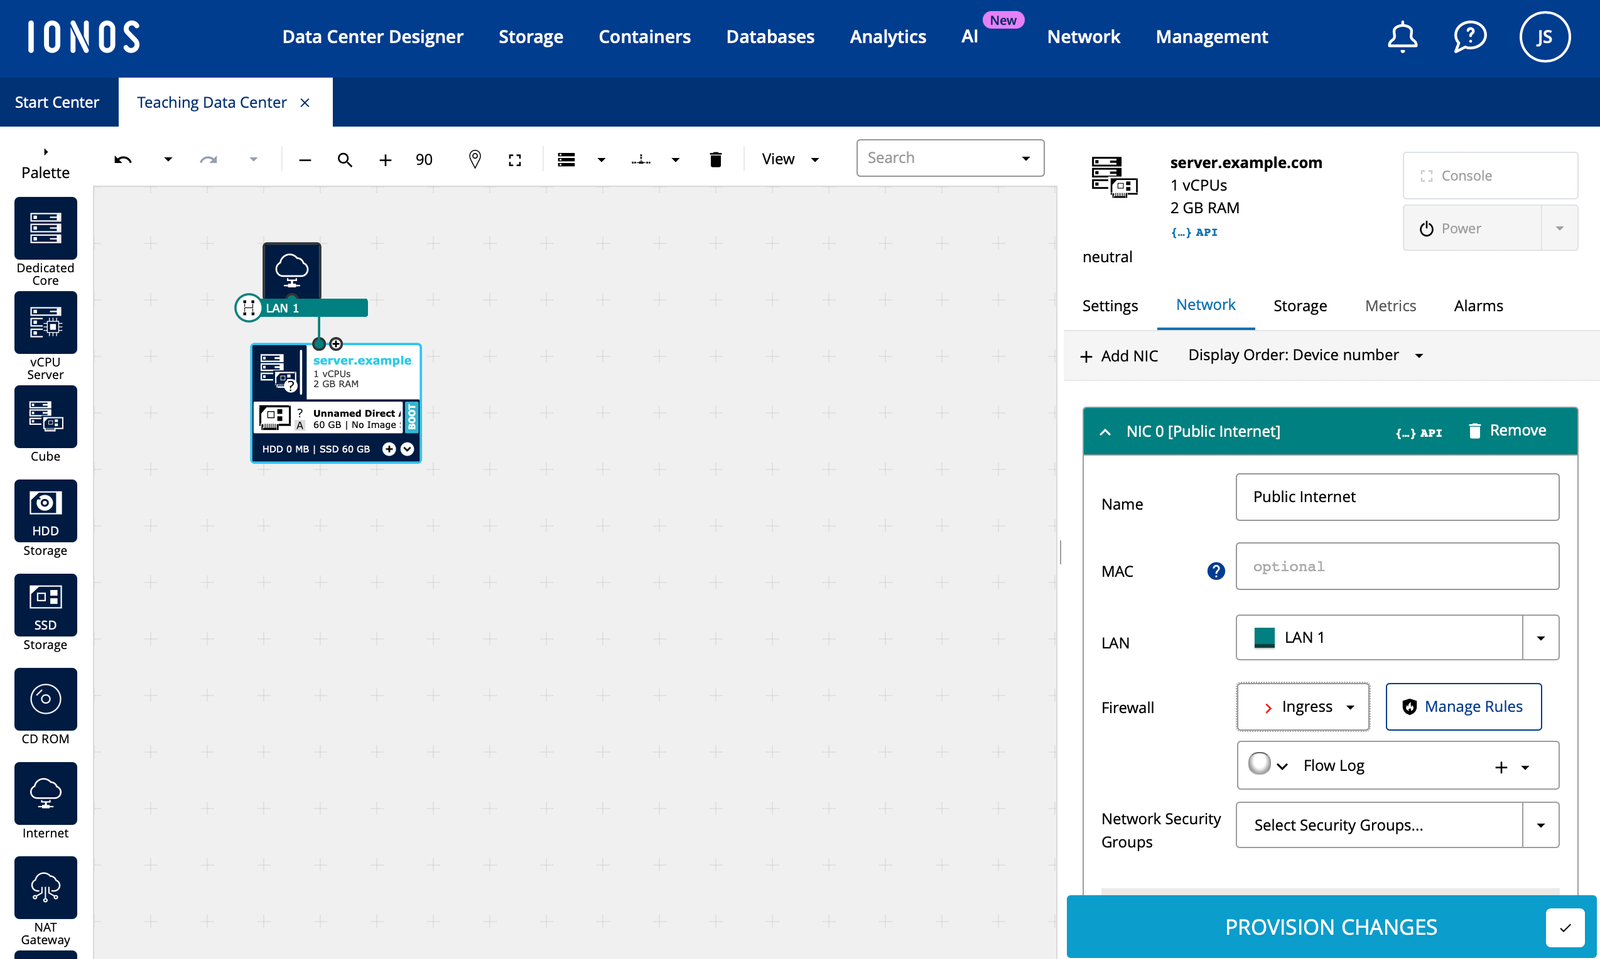
Click on “Create Firewall Rule,” and choose “Any Protocol.”
For the name enter “Home (v4)” and enter your version 4 IP address in the “Source IP / CIDR” field.
Click on “Create Firewall Rule” again and choose “Any Protocol.”
For the name enter “Home (v6)” and enter your version 6 IP address in the “Source IP / CIDR” field.
Click “Save.”
Provision Disks
Click on “Storage” the next to “Add:” click on “CD-ROM.” From the dropdown menu choose IONOS Images and choose “ubuntu-24.04-live-server-amd64.iso“. Then check “Boot from Device” and click “Create CD-ROM Drive.”
Next click on “Unnamed Direct Attached Storage” and enter a name for the drive. Typically your name is “disk#.server.domain.com” as in disk and the number, then your servers fully qualified domain name.
Commit the Changes
Click on “PROVISION CHANGES and “Provision Now.”
You will watch progress bars provisioning the resources and when it is done, it will say “Provisioning Complete.”